TrustSync app can help you manage negative customer feedback via low reviews or ratings with its built-in Negative Feedback feature. Using this Shopify app, you can easily redirect low ratings to a separate form through your review collection email where your customers can share their experience.
So, you can avoid auto-publishing low reviews on review platforms and find out more about the customers’ negative experiences. As a result, you will be able to improve the weak areas in your business and offer superior products and services to your customers. This can help improve your business reputation in the long run.
How To Use TrustSync’s Negative Feedback Feature?
We will now show you how to use the ‘Negative Feedback’ feature in TrustSync. Make sure you have installed TrustSync app in your Shopify store. Then, follow these steps:
Step 1: Configure Your Negative Review Settings
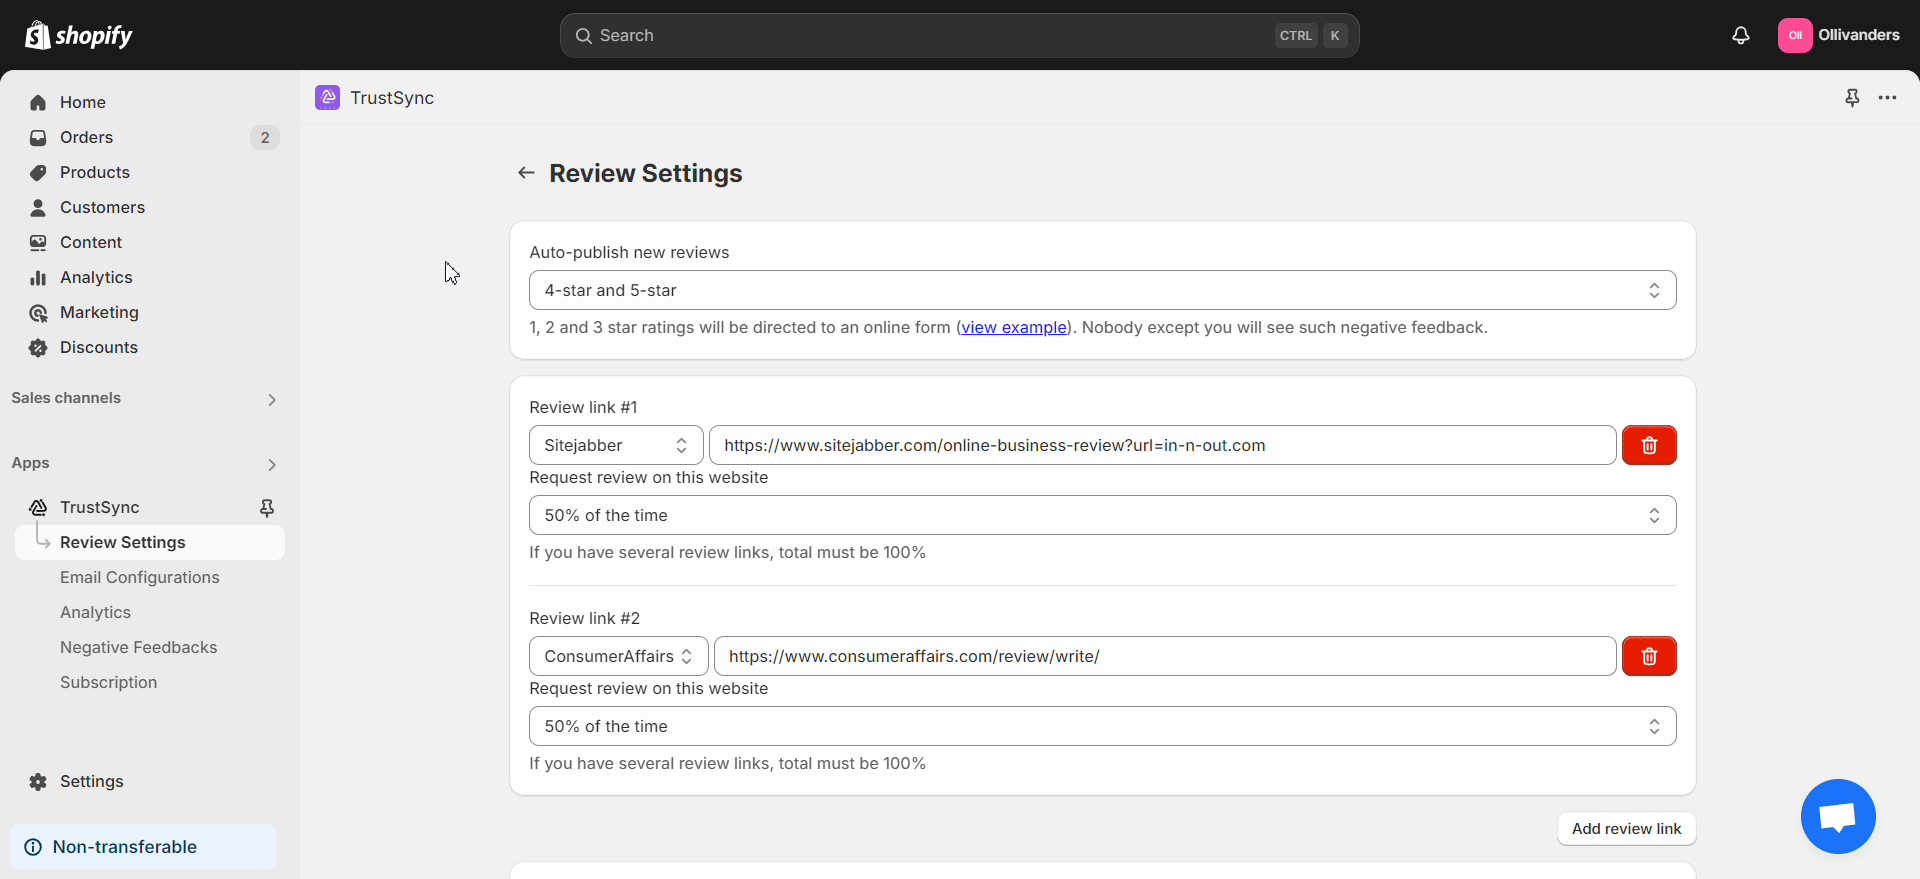
First, you have to configure your Review Settings in TrustSync. To do this, navigate to the ‘Review Settings’ tab under TrustSync from the Shopify dashboard. Now, you can set the reviews that will be auto-published and those that will be taken to the Negative Feedback form.
For example, you do not want 1, 2 and 3 star reviews to be auto-published on review platforms. You want just the 4 and 5-star reviews to be auto-published. To do this, select the corresponding option (4 and 5-star reviews) from the ‘Auto-publish new reviews’ dropdown. Your low ratings with 1, 2 and 3-star reviews will be taken to a separate Negative Feedback form. They will not be auto-published on review platforms.
Step 2: Customize Email Configurations
Next, check the content and structure of the review collection email. To do this, navigate to the ‘Email Configurations’ tab in the left side panel. Here, you can customize the review collection email template by modifying the content, designs, logo etc. You can also send a test email to any email address.
Then, select the ‘Email Settings’ option on the top. Here, you can set when to send the review collection email. You also get to set the order status after which to send the email (after fulfilled, after the tag is added, after order created or after order paid). Enable other options for repeat orders, 2nd email, specific sending time etc.
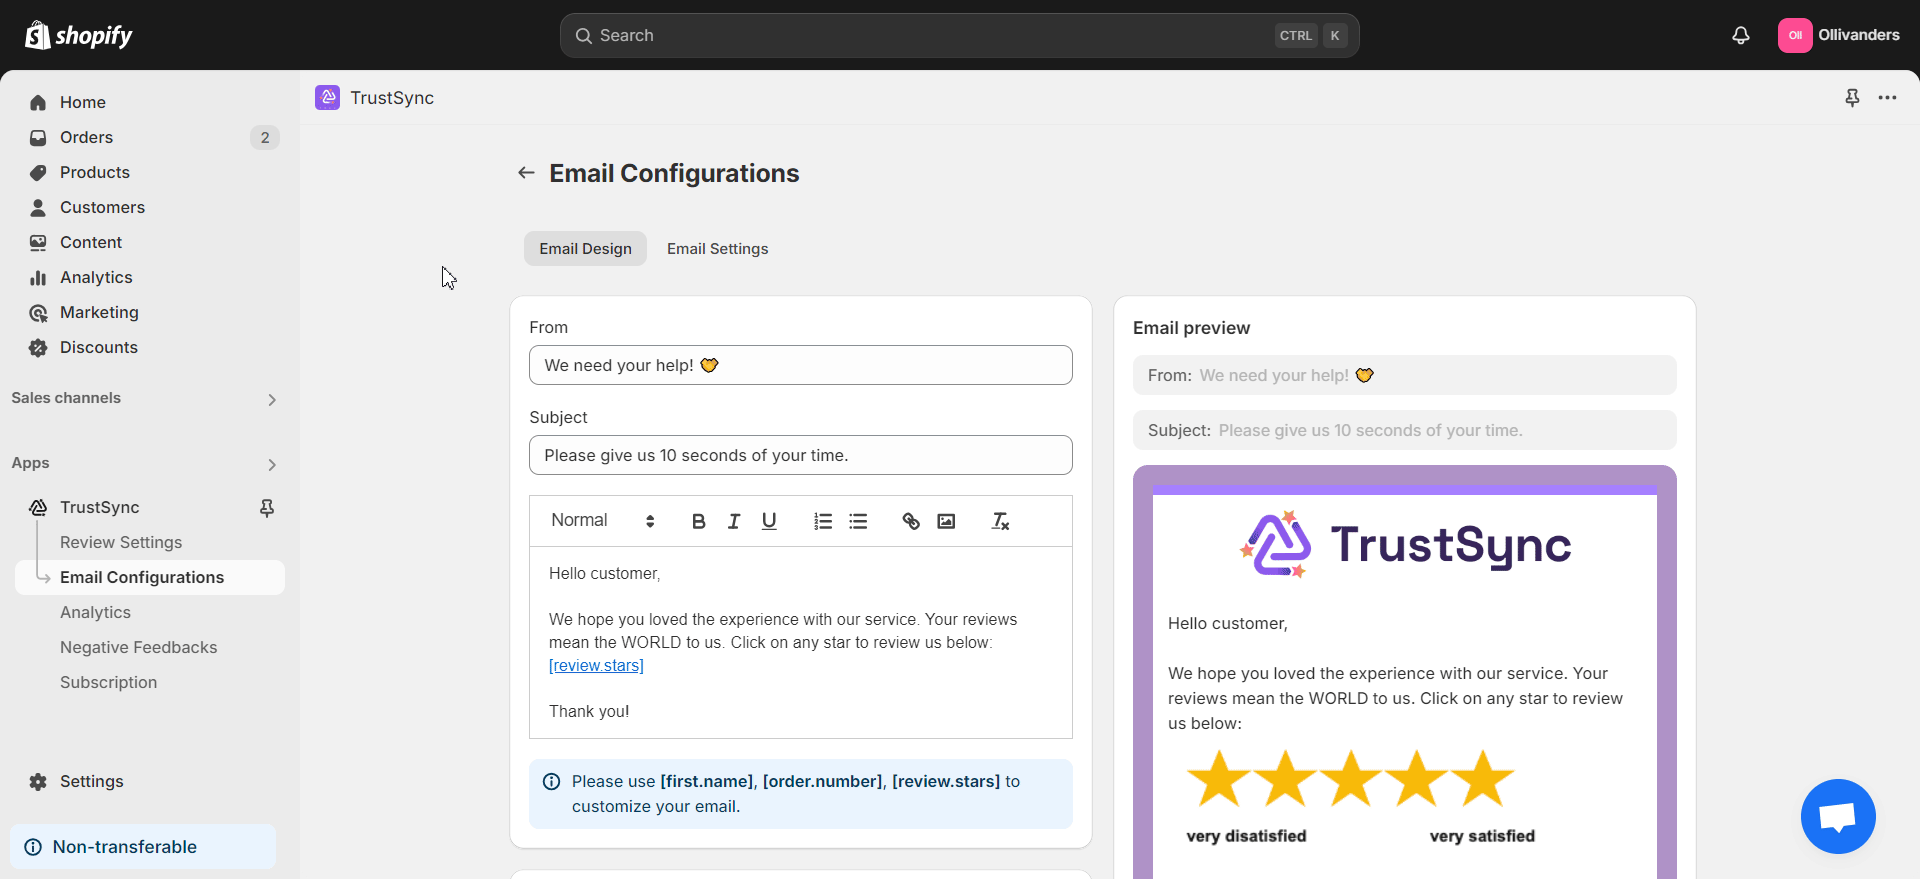
When customers now receive a review collection email from you, they can click on the rating buttons like stars, numbers or icons ranging from 1 to 5 stars. If they click on 1, 2 or 3 stars to leave a negative review, they will be taken to the Negative Feedback form. They will not be taken to the review platform. But if they select 4 or 5 stars, they will be taken to a review platform you have selected. There, they can share their positive experience with your store.
Step 3: Manage Negative Feedback
As you can see in the GIF below, a customer has received a review collection email from your end according to your selected Email Configurations. When a low rating is chosen, the customer is taken to a Negative Feedback form. Here, the customer can share the experience, attach the image and provide their name and email. After clicking the ‘Submit’ button, the negative feedback will be sent to the store owner in the TrustSync app.

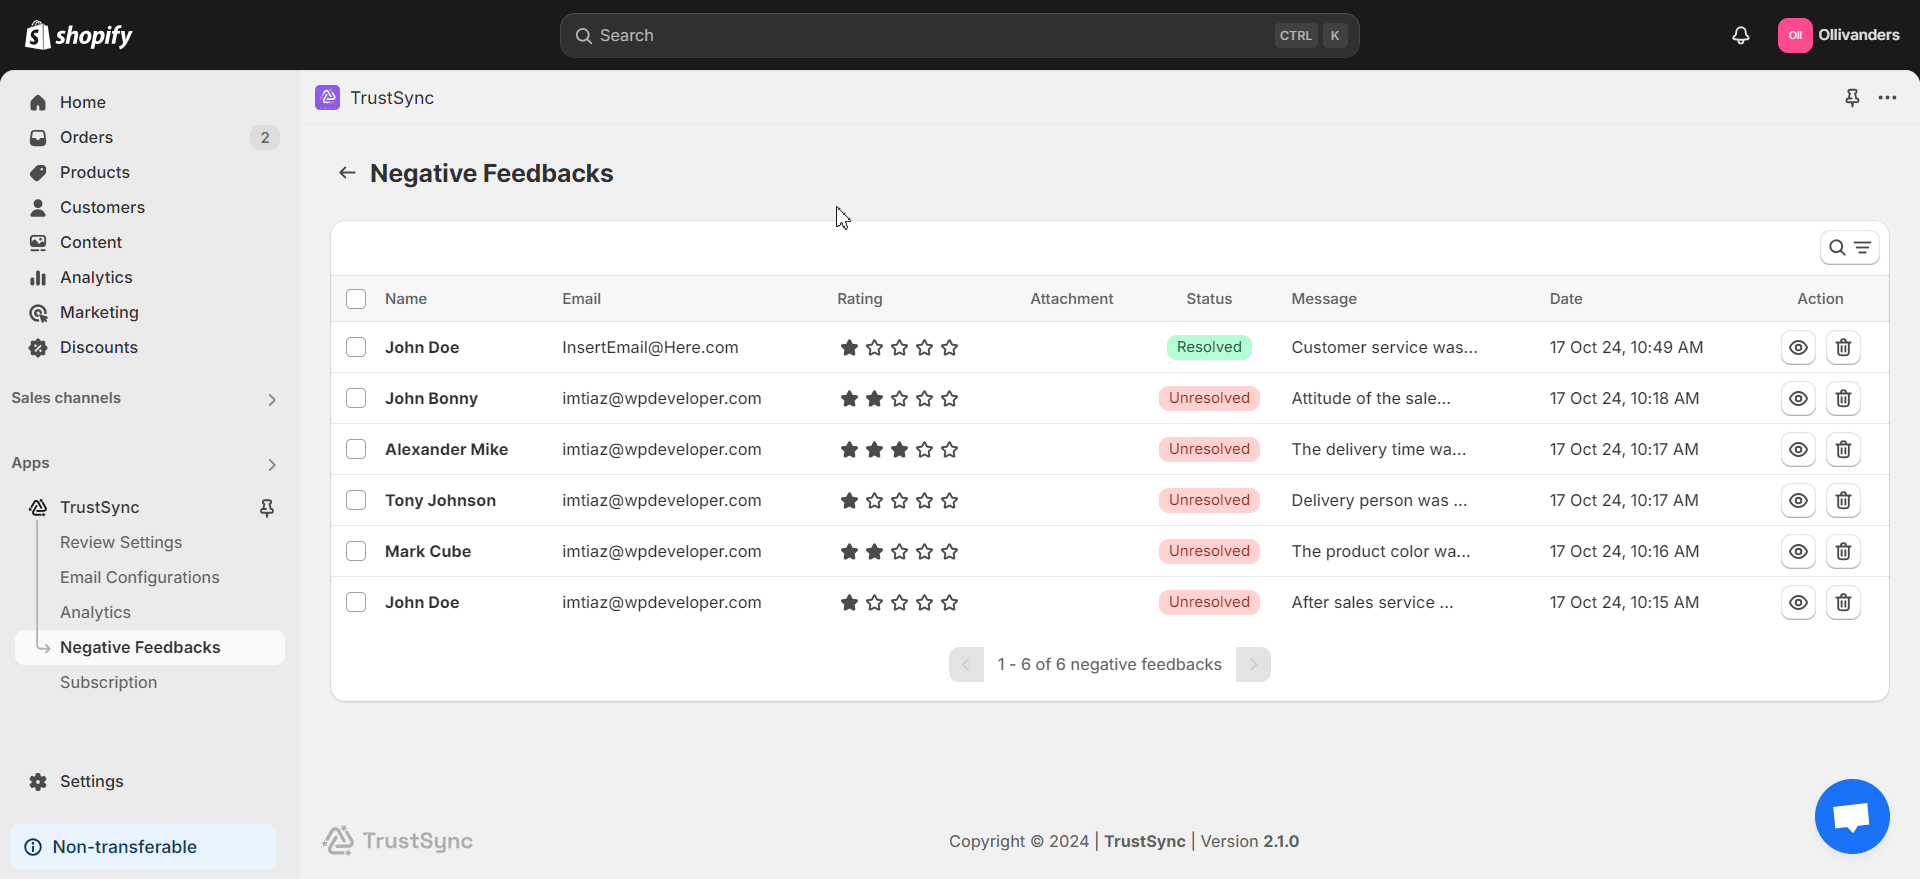
Back to TrustSync, let us find out how the store owner can check the negative reviews. To do this, navigate to the ‘Negative Feedbacks’ tab in the left side panel under TrustSync from the Shopify dashboard. Here, you will find the list of all negative feedback from your customers via your review collection emails.
The name, email, attachment, status, message preview and date for each review will be included. As you can see in the GIF below, the negative feedback shown above is visible in the list. To check individual details, click on the ‘View’ icon on the right side of any feedback.
Now, you can check all the details of the feedback including the full message. Under the ‘Reply’ section, you can write your message as a reply to the customer. Furthermore, you can change the ‘Unresolved’ status to ‘Replied’ or ‘Resolved’ status. Click on the ‘Submit’ done once you are done and the negative feedback will be updated. If you have written any reply, it will be sent to the customer’s email address.
Note: Upgrade your TrustSync plan to unlock advanced features like replying to negative feedback.

If you want to delete any feedback from the list, click on the ‘Remove’ icon on the right side. You can also select multiple feedbacks and remove them together.
This is how easily you can use the Negative Feedback feature in TrustSync to manage low ratings or reviews from customers. Need assistance? Feel free to reach out to our dedicated support team for any type of queries.


